


The Accessible Garden Solution: U Shaped Raised Bed That Makes Gardening Possible For Everyone

Understanding Your Gardening Needs
Identifying Your Gardening Style
Gardening is like a fingerprint—everyone's got their own style. Figuring out yours is the first step to growing a garden that makes you smile. Raised garden beds are a great option for many folks, giving you a neat little plot where you can keep an eye on soil quality, drainage, and plant spacing. These beds are like mini fortresses for your plants, sitting above the ground and usually framed to keep everything snug (Eartheasy).
To figure out your gardening groove, ask yourself:

- Are you all about veggies, flowers, or a bit of both?
- Is organic gardening your jam?
- How much time can you spare each week to get your hands dirty?
- Do you like DIY projects like building and keeping up garden structures?
Answering these will help you decide if a raised garden bed is your garden's new best friend.
Assessing Your Space and Requirements
Once you’ve nailed down your style, it’s time to size up your space and what you need. Raised beds need some elbow room, so leave two to three feet between them for easy access. Keep paths around them weed-free with stuff like cardboard, sawdust, pine needles, or gravel.
Think about these when checking out your space:
- Location: Pick a sunny spot for your raised bed. It could be in a side yard, front yard, or even on a driveway. If your area’s a bit hilly, you might need to tweak things for good drainage (Savvy Gardening).
- Size: Decide on the size of your raised bed based on your space and what you want to grow. A u-shaped raised bed can be a smart choice for making the most of your space and keeping things within reach.
- Irrigation: Think about setting up an irrigation system like drip irrigation before you finish and fill your raised beds. This way, hoses can run under paths or mulch, fitting the bed around the watering system.
By sizing up your space and needs, you can plan a garden that works for you. For more tips on getting your garden going, check out our articles on raised garden kits and raised bed planner.
Choosing the Right Raised Garden Bed
Picking the right raised garden bed is like finding the perfect pair of shoes for your garden. Let's chat about what to look for in materials, shapes, and sizes to make your garden the envy of the neighborhood.
Material Considerations
The stuff you use for your raised garden bed can make or break your garden's success. Here's the lowdown on some popular choices:
Wood
Wood's the old-school favorite for raised beds, especially cedar and redwood. These woods are tough cookies, naturally fighting off rot and pests, and they look pretty snazzy too. Plus, wood keeps the soil cozy, which plants love.
| Material | Durability | Maintenance | Cost |
|---|---|---|---|
| Cedar | High | Low | Moderate |
| Redwood | High | Low | High |
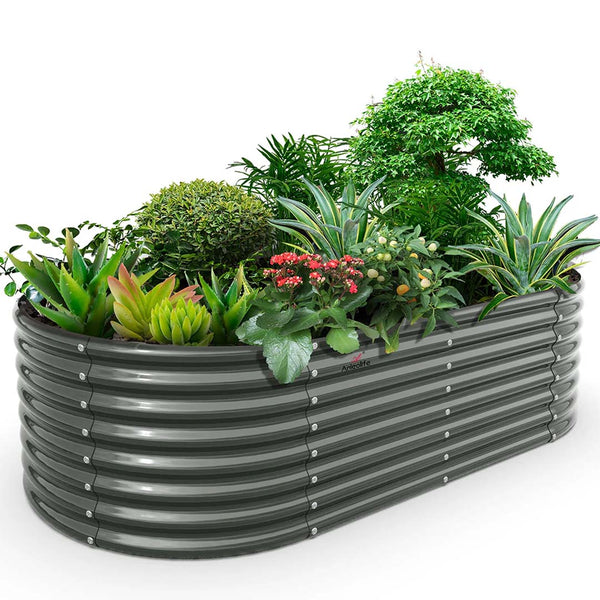
Metal
Metal beds are like the tanks of the garden world, lasting 20 to 30 years. But they need a bit of TLC to handle the weather and might mess with soil air and water flow. Watch out for acidic soil, as it can rust the metal, which isn't great for your veggies (Durable GreenBed).
| Material | Durability | Maintenance | Cost |
|---|---|---|---|
| Metal | Very High | Moderate | High |
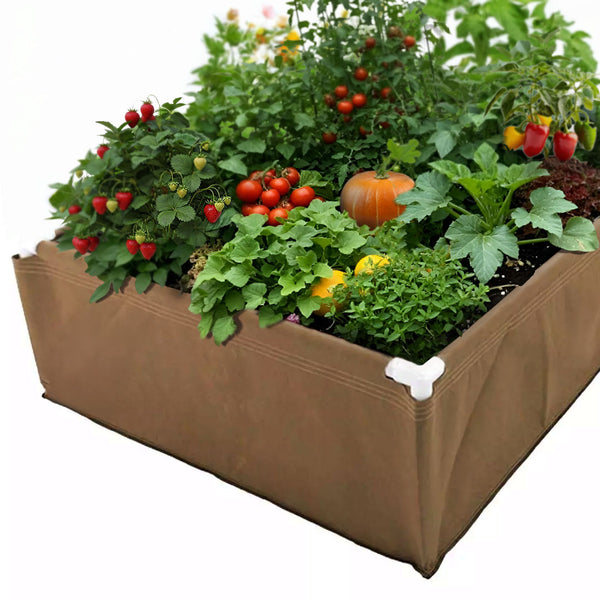
Fabric
Fabric beds, like Living Soil Fabric Beds, are the featherweights of the garden world. They're easy to move, let roots breathe, and are perfect for tight spots like patios and balconies. They're also a hit with no-till and organic gardeners.
| Material | Durability | Maintenance | Cost |
|---|---|---|---|
| Fabric | Moderate | Low | Low |
Shape and Size Selection
The shape and size of your garden bed can make gardening a breeze or a backache. Here's what to think about:
U-Shaped Raised Beds
U-shaped beds are the bee's knees for using space wisely and keeping plants within arm's reach. You can get to the middle without trampling the soil, which keeps it healthy. Check out the U-shaped kits from Durable GreenBed (Durable GreenBed).
| Shape | Accessibility | Space Utilization |
|---|---|---|
| U-Shaped | High | Excellent |
Rectangular and Square Beds
These shapes are the chameleons of the garden world, fitting into all sorts of layouts. They're great for traditional planting and can be tweaked to fit your space.
| Shape | Accessibility | Space Utilization |
|---|---|---|
| Rectangular | Moderate | Good |
| Square | Moderate | Good |
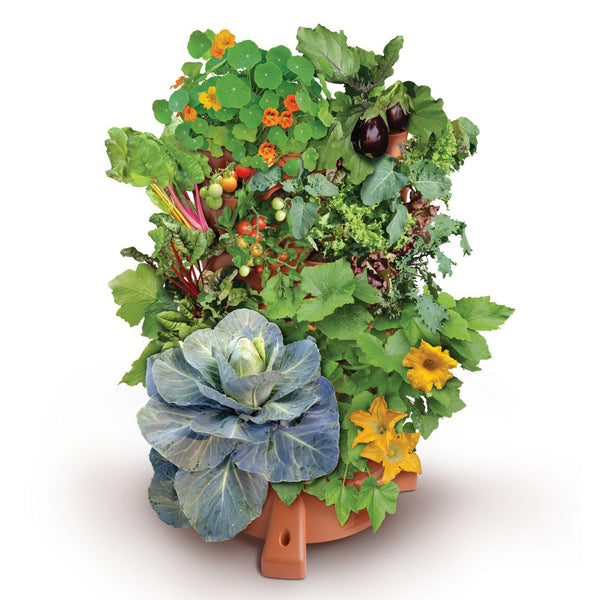
Planters
Planters are the go-to for small spaces or city gardens. They come with bottoms, making them easy to move around, and they're perfect for patios and balconies. Grow your herbs, veggies, and flowers in style.

| Shape | Accessibility | Space Utilization |
|---|---|---|
| Planters | High | Excellent |
Picking the right raised garden bed is all about matching materials and shapes to your gardening style. Whether you're into the classic wood look, the long-lasting metal, or the easy-breezy fabric, there's something for everyone. For more tips on setting up your garden bed, check out our step-by-step construction guide.
Building and Setting Up Your Raised Bed
Creating a raised bed garden is a fun project that can really change up your gardening game. Let's jump into how to build and set up your U-shaped raised bed.
Step-by-Step Construction Guide
Building a U-shaped raised bed is a piece of cake if you've got the right stuff. Here’s how to get rolling:
- Gather Materials and Tools:
- Untreated cedar boards (they last longer)
- Framing angles (4", 8", or 12")
- Hex screws (2.5" long, 1/4" diameter)
- Washers and nuts
- Drill and drill bits
- Framing square
- Measuring tape
- Saw
- Cut the Cedar Boards:
- Measure and cut the cedar boards to the size you want. For a typical 4' x 4' x 1' U-shaped bed, you’ll need:
- 4 boards for the sides (4 feet each)
- 4 boards for the ends (4 feet each)
- 2 boards for the inner sections (2 feet each)
- Assemble the Frame:
- Lay out the boards on a flat surface to form the U-shape.
- Use the framing angles to lock the corners. Make sure the corners are flush and at 90 degrees using a framing square.
- Drill pilot holes and attach the boards with hex screws, washers, and nuts.
- Reinforce the Structure:
- Add extra framing angles at the midpoints of the longer sides for more stability.
- Double-check all connections to make sure everything's tight.
- Finish the Assembly:
- Stand the U-shaped frame upright and put it where you want it.
- Make any tweaks needed to ensure the bed is level and solid.
Placement and Preparation Tips
Getting the spot and prep right is key to a killer raised bed garden. Here are some tips to make the most of your U-shaped raised bed:
- Choose the Right Location:
- Pick a spot that gets at least 6-8 hours of sunlight a day.
- Make sure the area drains well to avoid soggy soil.
- Prepare the Ground:
- Clear out any grass, weeds, or junk.
- Level the ground to give your raised bed a solid base.
- Add a Weed Barrier:
- Lay down some landscape fabric or cardboard at the bottom to keep weeds from sneaking in.
- Fill with Quality Soil:
- Use a mix of top-notch garden soil and compost to fill your raised bed. This will give your plants the nutrients they need.
- Shoot for a soil depth of at least 12 inches to let roots grow freely.
- Plan Your Planting Layout:
- Think about how big your plants will get and space them out accordingly.
- Group plants with similar water and sunlight needs together.
By following these steps, you'll have a sturdy and productive U-shaped raised bed ready for planting. For more info on soil prep and planting techniques, check out our article on gardening in raised beds.
| Material | Quantity | Purpose |
|---|---|---|
| Cedar Boards | 8 (4' each) | Frame construction |
| Framing Angles | 8 | Corner reinforcement |
| Hex Screws | 32 | Assembly |
| Washers and Nuts | 32 | Assembly |
For more resources and ideas, explore our guides on raised garden kits and raised flower beds DIY. Happy gardening!
Soil Preparation and Planting
Alright, folks, let's get our hands dirty with some good ol' soil prep and planting for those raised garden beds. We're talking about the nitty-gritty of soil quality, what goes in it, and how to plant like a pro.
Soil Quality and Composition
The secret sauce to a killer garden? It's all in the dirt. For raised beds, you want a mix of your local dirt or topsoil and some organic goodies like compost. This combo is like a buffet for your plants, giving them all the nutrients they need to grow big and strong (Journey with Jill). Steer clear of potting soil—it’s like a sieve and doesn’t pack enough punch in the nutrient department.
Recommended Soil Mix for Raised Beds:
- Topsoil or Native Soil: 50%
- Compost: 50%
Trying to pinch pennies on soil? Check out the Hugelkultur method. It's a fancy word for stacking up garden scraps like old logs, twigs, grass clippings, coffee grounds, and compost before topping it off with soil. This method is a moisture magnet, keeps your soil in tip-top shape, and helps with water retention (Vego Garden).
Planting Techniques and Maintenance
With your soil ready, it's time to get planting and keep that garden looking sharp.
Planting Techniques:
- Spacing: Give your plants some elbow room. Overcrowding is a no-go if you want them to get enough nutrients, light, and air. Check those seed packets or plant tags for the lowdown on spacing.
- Depth: Plant your seeds or seedlings at the right depth. A good rule of thumb is to plant seeds about two to three times their size.
- Companion Planting: Buddy up your plants to make the most of your space and boost plant health. For instance, marigolds are great pals for veggies—they help keep the pests at bay.
Maintenance Tips:
- Watering: Keep it consistent. Raised beds dry out quicker than their in-ground cousins, so keep an eye on soil moisture. A drip irrigation system can be a lifesaver for efficient watering.
- Mulching: Throw on a layer of mulch to lock in moisture, keep weeds at bay, and keep the soil cozy. Organic mulches like straw, wood chips, or grass clippings are your best bet.
- Weed Control: Stay on top of those pesky weeds. Yank them out regularly so they don't hog all the nutrients and water. Mulching can help keep them in check.
Stick to these soil prep and planting tips, and you'll be on your way to a thriving raised bed garden. For more on gardening in raised beds and raised garden kits, check out our other articles.
Maximizing Your Raised Bed Garden
Watering and Irrigation Systems
Keeping your raised bed garden happy and hydrated is key to its success. One of the easiest ways to make sure your plants get the water they need is by setting up an irrigation system. Drip irrigation is a top pick because it sends water straight to the roots, cutting down on evaporation and waste (Savvy Gardening). You can set this up before you fill your raised bed, letting hoses sneak under paths or mulch.
| Irrigation System | Benefits |
|---|---|
| Drip Irrigation | Direct water delivery, less evaporation, saves water |
| Soaker Hoses | Simple to set up, waters evenly, budget-friendly |
| Sprinklers | Covers big areas, adjustable, user-friendly |
When you're getting your irrigation system ready, keep these tips in mind:
- Make sure it fits the shape and size of your raised bed.
- Use timers to make watering automatic.
- Check for clogs or leaks now and then to keep it running smoothly.
For more on setting up irrigation systems, swing by our article on gardening in raised beds.
Mulching and Weed Control Strategies
Mulching is like giving your raised bed garden a cozy blanket. It keeps the soil temperature just right, holds onto moisture, and keeps those pesky weeds at bay. Wood chips are a favorite mulch choice because they do all this while slowly turning into soil goodness.
| Mulch Type | Benefits |
|---|---|
| Wood Chips | Holds moisture, keeps soil cool, breaks down into soil |
| Straw | Light, easy to spread, adds organic matter |
| Pine Needles | Makes soil acidic, lasts long, looks natural |
To mulch your raised bed like a pro:
- Spread a 2-3 inch layer of mulch around your plants.
- Keep mulch away from plant stems to avoid rot.
- Top up the mulch as needed to keep it working its magic.
Keeping weeds in check is another must-do for getting the most out of your raised bed garden. Clear the paths around your beds of weeds and grass using stuff like cardboard, sawdust, pine needles, or gravel. This not only makes your garden look neat but also stops weeds from stealing nutrients and water.
For more tips on keeping your raised bed garden in tip-top shape, check out our articles on raised garden bed and raised bed planner.