


How to Build Galvanized Raised Beds Easily

How to Build Galvanized Raised Beds Easily
Looking to transform your garden with minimal effort? You'll love how galvanized raised beds combine durability with sleek industrial style. These metal wonders resist rust, outlast wooden alternatives, and create the perfect environment for your plants to thrive. With just a few materials and basic tools, you can assemble these beds in an afternoon. The secret lies in the simple assembly process that doesn't require welding or specialized skills. Ready to discover exactly how it's done?
Key Takeaways
- Cut galvanized steel sheets to desired dimensions and attach to wooden 4x4 corner posts with metal screws.
- Create a center brace using 23.5-inch and 49-inch wooden sections to prevent bowing of metal sides.
- Mix soil using one-third native soil, one-third peat moss, and one-third compost for the top 12 inches.
- Install wood trim (1x2 and 1x4) to cover sharp metal edges and provide a convenient workspace.
- Use metal screws with rubber grommets for secure connections between all components.
Materials and Tools You'll Need for Galvanized Beds
When building your own galvanized raised beds, having the right materials and tools on hand will make the construction process smooth and efficient.

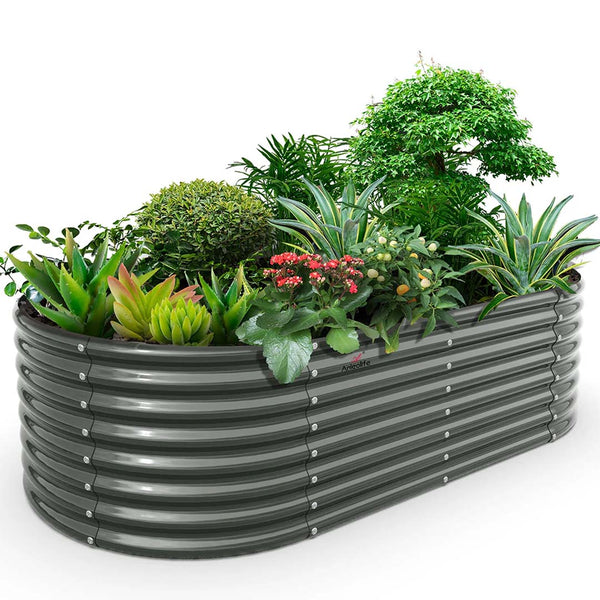
You'll need galvanized steel sheets cut to your desired dimensions—typically for 4×8 feet beds that stand 26 inches deep. Gather 4×4 wooden corner posts for sturdy support and metal screws with rubber grommets to secure everything together.
Don't forget essential tools like a drill for pre-drilled holes, measuring tape for precise cuts, and a saw for creating your support structure.
The middle supports (23.5 and 49-inch wooden pieces) are vital to prevent bowing when you fill with premium soil quality. Always wear heavy-duty gloves when handling sharp steel sheets—safety first!
Optional wood trim adds both protection and aesthetic appeal to your raised garden beds.
Step-by-Step Assembly Process
Construction of your galvanized raised bed starts with proper positioning of your 4x4 corner posts. First, cut notches in these posts where the galvanized steel panels will attach—this guarantees a flush fit and enhances your construction integrity.
Secure the panels to the posts using metal screws with rubber grommets for a watertight connection that'll stand the test of time.
To prevent soil pressure from compromising your metal raised garden:
Proper bracing and secure connections protect your galvanized garden investment from soil pressure damage.
- Install a center brace using two 23.5-inch pieces and one 49-inch wooden section
- Attach all galvanized steel panels with roofing screws for maximum stability
- Finish with 1x2 and 1x4 wood trim for safety and a convenient gardening workspace
You'll appreciate how this support structure prevents bowing when your raised garden bed is filled, making your investment truly worthwhile.
Adding Soil and Preparing for Planting
Now that your galvanized raised bed stands sturdy and ready, it's time to fill it with the perfect growing medium.

Create an ideal soil mix using one-third native soil, one-third peat moss, and one-third compost for the top 12 inches, while using cheaper fill for lower layers. Don't guess quantities—use a soil calculator to determine exact amounts based on your bed dimensions.
Before adding soil, verify proper drainage by checking for or creating holes in the bottom of your galvanized raised beds.
Once filled, let the soil settle for a few days, then top off any low spots. Finally, boost soil fertility by working organic fertilizers into the top layer.
This preparation creates the best foundation for exceptional plant growth in your new bed, giving your garden a productive start.
Enhancing Your Raised Beds With Trim and Support
Your galvanized raised bed may be filled with perfect soil, but adding thoughtful trim and support elements takes it from merely functional to both beautiful and practical.
Install one-by-two and one-by-four wood trim to cover those sharp edges of metal panels, creating a safer gardening experience while adding a convenient workspace shelf for your tools.
Don't forget these essential structural elements:
- Center supports measuring 23.5 and 49 inches prevent bowing when your bed is filled with soil
- Roofing screws with rubber grommets guarantee secure attachment of trim and supports
- Proper corner post connections establish the foundation for long-term durability
These enhancements aren't just cosmetic—they're investments in your garden's longevity.
Frequently Asked Questions
Can You Use Galvanized Metal for Raised Garden Beds?
Yes, you can use galvanized metal for raised beds! It's durable, rust-resistant, and outlasts cedar. Just add drainage holes and use a balanced soil mix for ideal growing conditions.
What Are Three Mistakes to Avoid When Gardening With Raised Beds?
Avoid overfilling beds with soil, which causes root rot. Don't use toxic treated lumber that leaches chemicals. Remember to space your plants properly to prevent disease and guarantee good airflow.
Is It Cheaper to Buy or Build a Raised Garden Bed?
You'll save substantially by building your own raised beds. DIY options cost $240-$545 versus pre-made galvanized tubs at $250-$300 each, potentially saving you $1500-$2000 on a complete garden setup.
How Long Will Galvanized Raised Garden Beds Last?
You'll get 10-20+ years from galvanized raised beds. They're impressively resistant to rust, decay, and warping—even in wet climates. They'll outlast wooden alternatives and save you money long-term.