


DIY Guide for Building Galvanized Raised Beds

DIY Guide for Building Galvanized Raised Beds
You've probably seen those sleek, modern galvanized raised beds popping up in gardens everywhere—and for good reason. They're not just eye-catching; they outlast wooden beds by years and create the perfect growing environment for your plants. If you've been hesitating to build your own, you might be surprised at how straightforward the process can be. With just a weekend and some basic tools, you'll transform your garden space into something both functional and stunning.
Key Takeaways
- Cut galvanized metal panels to size, smooth edges, and pre-drill holes in wooden supports to prevent splitting.
- Secure metal panels to rot-resistant wood frames using 2.5-3" deck screws and plastic washers for watertight seals.
- Maintain square alignment throughout assembly and attach wooden caps at 45-degree angles for durability.
- Required tools include an electric drill, circular saw, measuring tape, and design sketch for layout planning.
- Expect an investment of $240-$545 that delivers decades of use with minimal maintenance requirements.
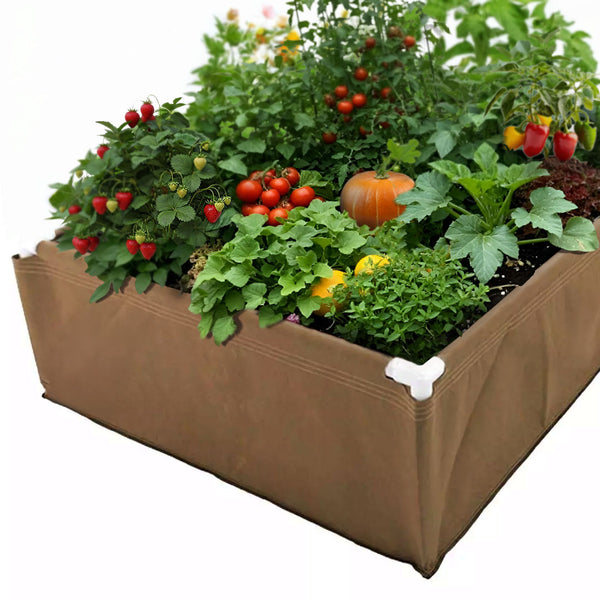
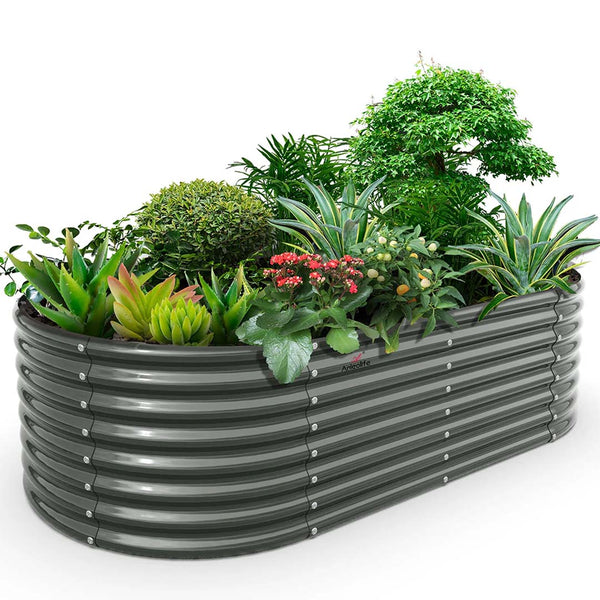
Why Galvanized Raised Beds Are Worth the Investment
While wooden raised beds might seem like the more affordable option initially, galvanized alternatives offer exceptional value that you'll appreciate for years to come.

These metal structures last decades with minimal maintenance, thanks to their rust-resistant coating that won't leach harmful chemicals into your edible plants.
You'll notice the difference in soil quality immediately. The non-porous galvanized metal prevents compaction and creates better drainage conditions, leading to healthier root development and reduced waterlogging issues.
Though requiring an upfront investment between $240-$545, you'll realize substantial long-term savings through reduced weeding time and higher crop yields.
Think of galvanized raised beds as infrastructure rather than an expense—they're the foundation of your garden's success, providing durability and performance that wooden options simply can't match.
Materials and Tools You'll Need for Construction
Now that you understand the advantages of galvanized raised beds, let's prepare for your building project. Gathering the right materials and tools guarantees a smooth construction process and creates beds that will withstand the seasons.
| Category | Essential Items | Purpose |
|---|---|---|
| Materials | Galvanized metal panels | Main structure |
| Rot-resistant wood (cedar/redwood) | Frame stability | |
| Quality screws (2.5-3" deck screws) | Secure assembly | |
| Plastic washers | Create watertight seals | |
| Tools | Electric drill | Fastening components |
| Circular saw | Cutting lumber precisely | |
| Measuring tape | Confirming accurate dimensions | |
| Design sketch | Planning garden bed layout |
Remember to pre-drill holes in your wooden components to prevent splitting. This preparation step is vital before you begin assembling your custom garden beds.
Step-by-Step Assembly Process
Building your galvanized raised beds follows four key assembly stages that transform raw materials into durable garden spaces. Start by cutting your galvanized metal panels to precise dimensions, carefully smoothing any sharp edges that could cause injury during the assembly process.
Next, pre-drill holes in your wooden supports to prevent splitting, then secure the metal panels to these frames using self-tapping screws. Maintain square alignment throughout for best structural integrity.
For a professional finish, attach wooden piece caps at 45-degree angles, enhancing both aesthetics and durability of your DIY raised garden bed.

Once assembled, inspect your building beds thoroughly for any protruding sharp edges or loose components. These careful steps make sure you'll create garden containers ready for well-draining soil and years of productive growing seasons.
Long-Term Maintenance and Care Tips
Although galvanized raised beds offer remarkable durability compared to wooden alternatives, they still require thoughtful maintenance to maximize their lifespan.
To prevent premature corrosion, maintain consistent soil moisture levels—overly dry soil accelerates oxidation. Make it a habit to conduct regular inspections for sharp edges or wear that could compromise structural integrity.
Avoid contact with acidic substances that degrade the galvanized coating. You'll want to periodically check that all screws remain tight and vertical posts stand straight—simple adjustments that preserve the bed's stability for years.
The beauty of these metal beds lies in their low-maintenance nature; while wooden beds demand annual treatments, your galvanized beds merely need occasional attention.
This minimal upkeep translates to more time enjoying your garden and less time worrying about repairs—a worthwhile investment for the serious gardener seeking longevity.
Frequently Asked Questions
Can Galvanized Metal Be Used for Raised Garden Beds?
Yes, you can absolutely use galvanized metal for your raised beds. It'll last decades, resist corrosion, and create ideal growing conditions while being safe for your vegetables and herbs.
What Are Three Mistakes to Avoid When Gardening With Raised Beds?
Don't overlook proper drainage, as soggy soil leads to root rot. Avoid using poor-quality soil mixes that compact easily. Never crowd your plants—they need room to thrive in their raised bed environment.
How to Build a Raised Bed Step by Step?
Level your ground, cut galvanized panels and lumber to size, pre-drill holes, assemble short sides first, then long sides, secure with self-tapping screws, position for sunlight, and fill with rich soil.
Is It Cheaper to Buy or Build a Raised Garden Bed?
You'll typically save money building your own raised bed. DIY options run $100-300, while pre-made options exceed $500. Plus, you'll enjoy customizing dimensions to perfectly fit your garden space.